
Brisket Trimming and Beef Tallow: The Secret Sauce for Next-Level BBQ
I'll never forget the first time I watched someone throw away a pile of brisket fat trimmings. Here I was, still learning the ropes of proper brisket fat trimming, and this guy just tossed what I now know is liquid gold straight into the trash.
Most backyard pitmasters focus so much on the cooking process that they completely overlook two crucial steps: proper trimming and what to do with those trimmings. Today I'm going to walk you through both, because mastering brisket fat trimming isn't just about getting better bark: it's about turning your scraps into one of the best cooking fats you'll ever use.
Why Brisket Fat Trimming Actually Matters
Here's the thing about brisket fat trimming that most people don't realize: it's not just about aesthetics or following some pitmaster's Instagram post. Poor trimming leads to uneven cooking, weak smoke penetration, and those charred, inedible edges that you end up cutting off anyway. I learned this the hard way after ruining more than a few expensive briskets.
When you leave too much fat, especially thick, uneven layers, you're creating barriers. Smoke can't penetrate properly, your BBQ rubs can't do their job, and different sections cook at different rates. The result? Parts of your brisket that are perfect while others are either undercooked or burnt to a crisp.
But here's where it gets interesting: the fat you trim off doesn't have to be waste. That's where beef tallow comes in, and trust me, once you start making your own, you'll wonder how you ever cooked without it.
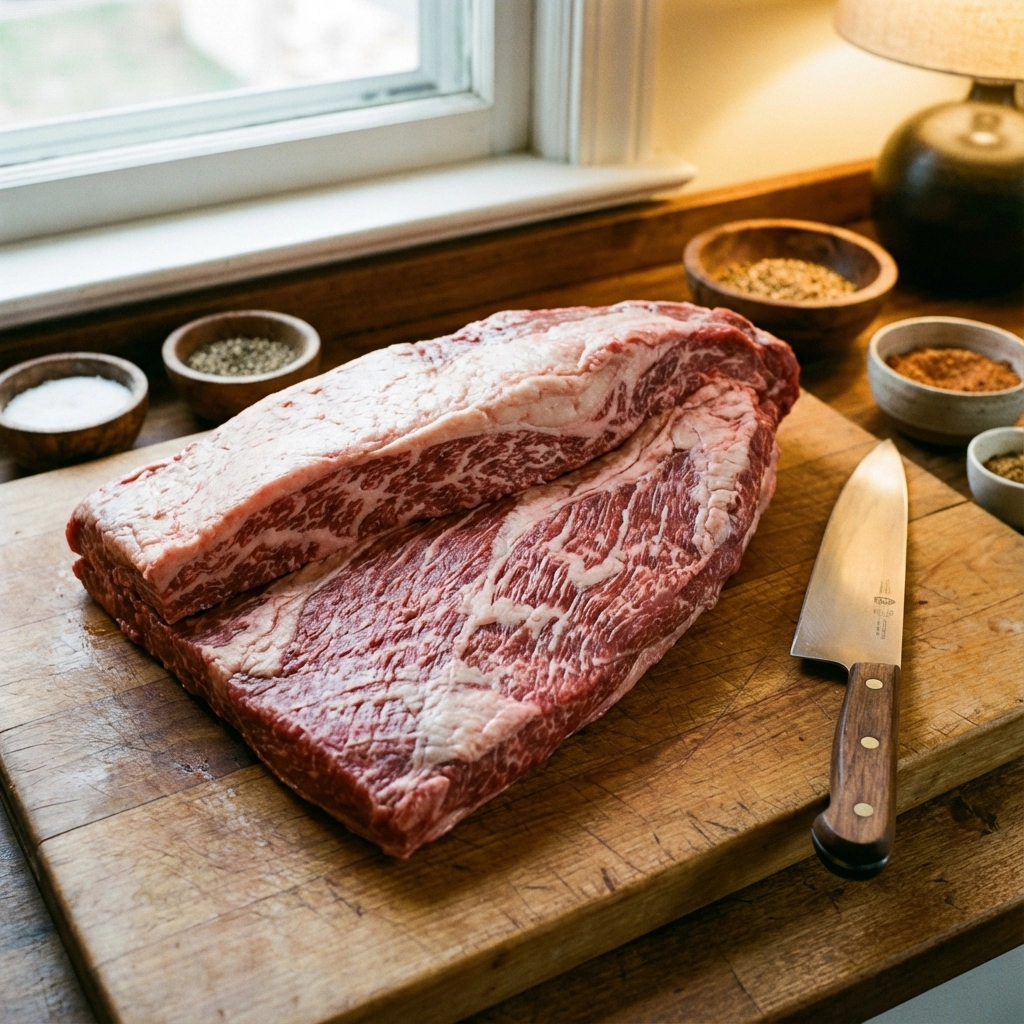
My Step-by-Step Approach to Brisket Fat Trimming
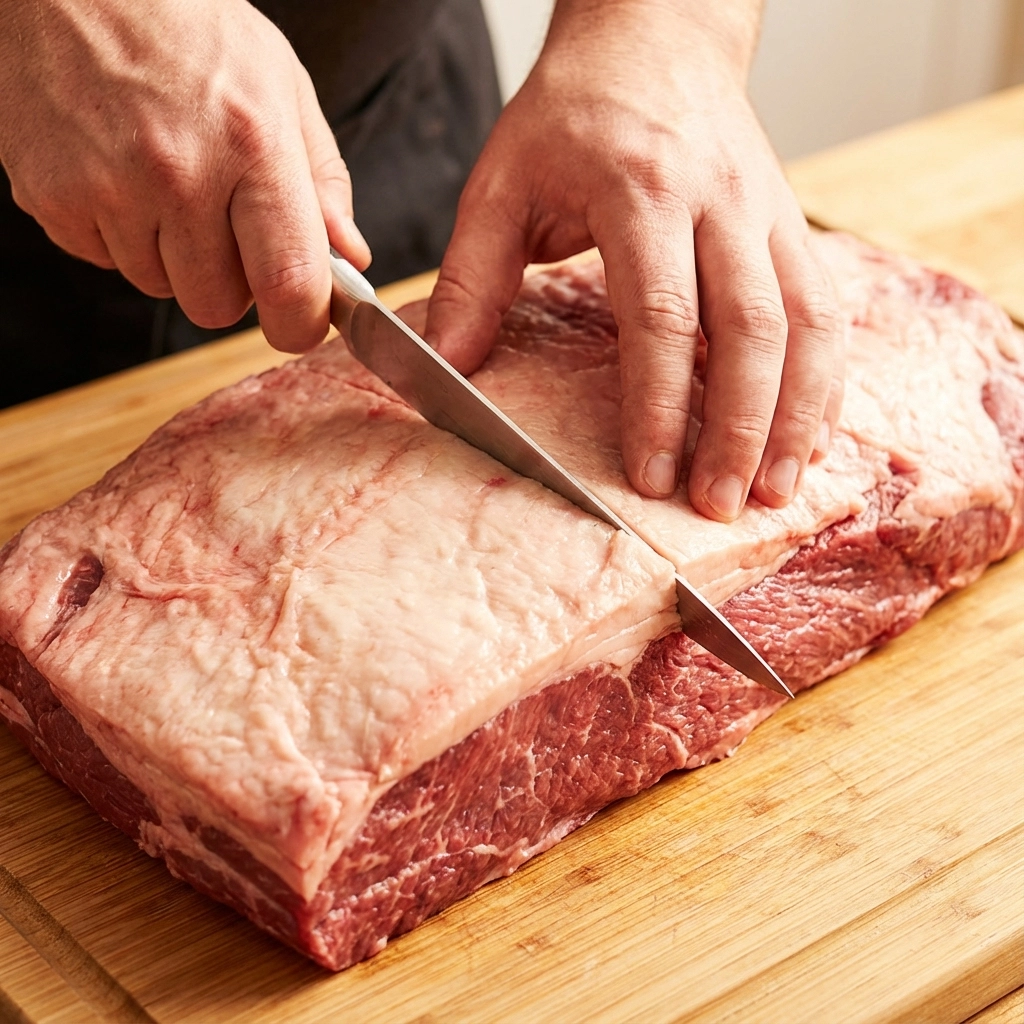
I always start with a sharp knife: and I mean sharp. Dull knives tear the meat and make precise cuts impossible. Over the years, I've developed a system that works consistently.
Start with the bottom side. Flip your brisket fat-side down first. Most people skip this step, but I like to clean up the underside because it helps with even smoke penetration. Look for any thick patches of fat or that silvery skin (silverskin) and trim it down. You don't need to go crazy here: just clean it up.
Remove the big chunks. There's usually a moon-shaped piece of hard fat on the point (the thicker end). This is called the mohawk. This stuff won't render during cooking, so it's got to go. I slide my fingers under it and use a gentle sawing motion with my knife. Save all these trimmings: they're perfect for making beef tallow (and/or ground beef).
Square it up. I trim the long, thin edges to create clean lines. Brisket cooking is all about even heat distribution, and weird angles and thin sections just burn. Take your time here and be conservative: you can always trim more, but you can't put meat back.
Work the fat cap. Now flip it fat-side up. This is where most people either go too aggressive or not aggressive enough. I aim for about a quarter to half-inch of fat cap thickness. Use the side view to spot thick areas that need attention.
The key is consistency across the whole surface. Some areas might need more trimming than others, but you want that fat cap to be relatively uniform. This isn't just for looks: it's about getting even rendering and protection for the lean parts underneath.
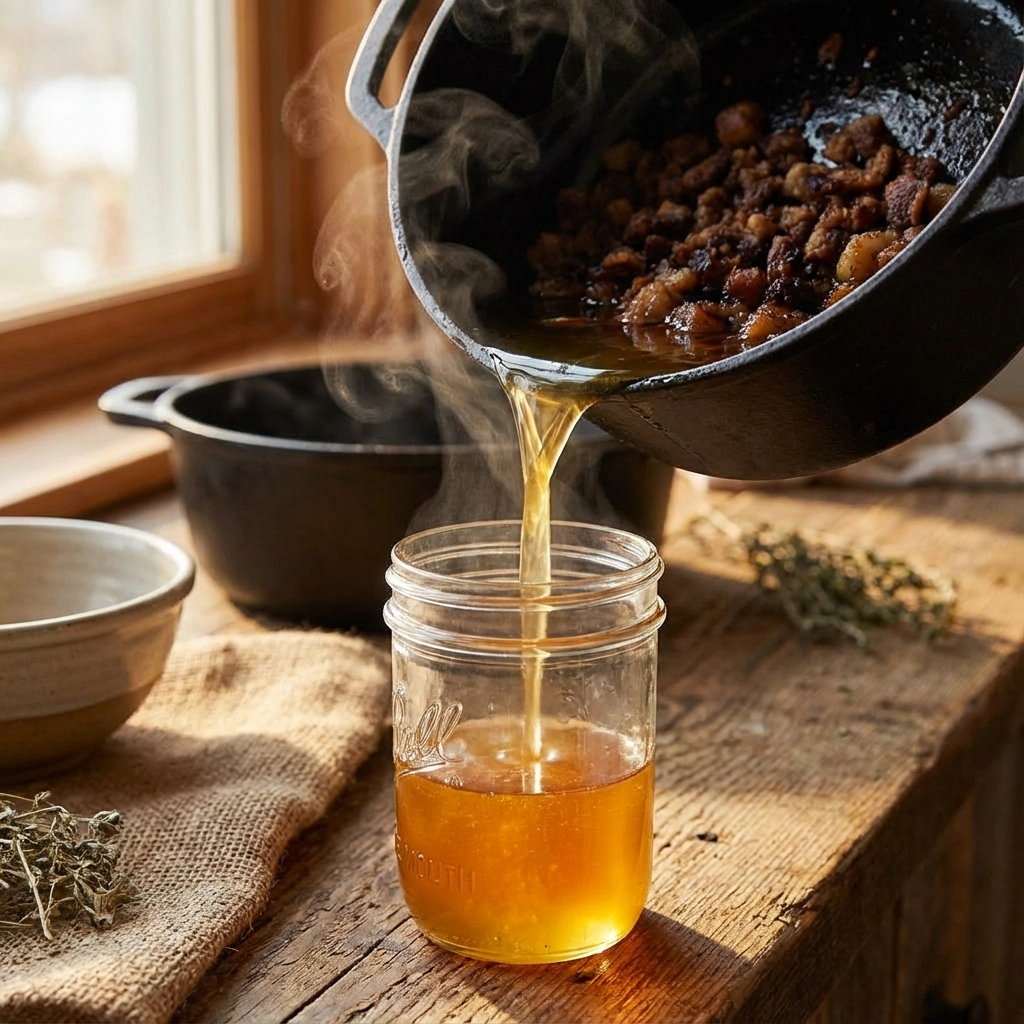
Making Beef Tallow: Turning Scraps into Gold
Now here's where the magic happens. All those fat trimmings you've been collecting? They're about to become one of the most flavorful cooking fats you've ever used.
I chop the trimmings into small, uniform pieces: about half-inch chunks work well. The smaller pieces render more efficiently. Toss them into a heavy-bottomed pot or slow cooker and set it on low heat. No need to add anything else; the fat will render on its own.
This process takes patience. I usually let it go for 2-3 hours, stirring occasionally. You'll know it's ready when the fat pieces (we call them cracklings) turn golden brown and crispy, and you've got clear, golden liquid fat.
Strain the liquid through a fine mesh or cheesecloth into a clean jar. What you've got now is pure beef tallow: and it's infinitely better than anything you can buy at the store because it came from quality beef that you selected yourself.

The cracklings? Don't toss them. They're like bacon bits on steroids. I use them in everything from cornbread to potato dishes.
How Beef Tallow Transforms Your Cooking
This is where beef tallow really shines, and it's something most backyard BBQ recipes never mention. Beef tallow has a high smoke point (about 400°F), which makes it perfect for high-heat cooking. But more importantly, it carries flavor in a way that vegetable oils just can't match.
I use beef tallow for searing steaks, for making home fries, and even for making the best smash burgers you've ever tasted. The depth of flavor it adds is incredible: rich, savory, and with just a hint of that smoky character from your trimmed brisket fat.
But here's where it gets really interesting for those of us who take our smoke house seasoning seriously: beef tallow enhances how rubs perform. When I'm developing new blends at Nate's Smokehouse, I test them with beef tallow because it helps the spices bloom and creates better bark formation.
Beef Tallow and BBQ Rubs: A Perfect Partnership
The relationship between beef tallow and BBQ rubs is something I discovered by accident. I was testing a new blend and had some beef tallow on hand, so I used it to bind the rub instead of my usual mustard slather.
The results were incredible. The tallow helped create an even spice distribution, and because it's a solid fat at room temperature, it stayed put during the initial smoking phase. As it slowly rendered, it essentially basted the meat with seasoned fat.
Now I regularly recommend this technique, especially with my more complex rub blends. The tallow acts like a flavor vehicle, helping carry the smoke house seasoning deeper into the meat while creating that perfect bark we're all chasing.
For those who want to try this, I brush a thin layer of melted beef tallow on the trimmed brisket before applying the rub. Not only does this help the seasoning stick, but it also gives you better color and flavor development.
Beyond BBQ: Other Ways I Use Beef Tallow
Once you start making your own beef tallow, you'll find uses for it everywhere. I keep a jar in my fridge at all times now. It's fantastic for roasting potatoes (seriously, the best you'll ever have), sautéing vegetables, and even making pie crusts if you're into baking.
My favorite non-BBQ use is for cooking eggs. A small amount of beef tallow in a cast iron pan creates eggs with incredible richness and flavor. It's also amazing for cooking hash browns: they get crispy on the outside while staying creamy inside.
I've even started using it in some of my backyard BBQ recipes that don't involve smoking. Beef tallow makes an incredible base for cooking onions and peppers for fajitas, and it adds depth to any dish that calls for cooking fat.
The shelf life is excellent too. Properly rendered and stored beef tallow will keep in the refrigerator for months, or you can freeze it for even longer storage.
Making Every Trim Count
The next time you're prepping a brisket, I want you to think differently about those fat trimmings. Instead of seeing waste, see opportunity. Proper brisket fat trimming isn't just about improving your cook: it's about maximizing every part of that expensive piece of meat.
Start with good knife skills, take your time with the trimming process, and save every scrap of clean fat. The beef tallow you make will elevate not just your BBQ game, but your overall cooking. And when you pair that homemade tallow with quality rubs and seasonings, you're creating layers of flavor that store-bought products simply can't match.
Your wallet will thank you, your taste buds will thank you, and honestly, you'll feel pretty good about not wasting a single bit of that premium brisket. That's what real barbecue is all about: respecting the meat and making the most of everything you've got.